Friday, July 31, 2009

U-Pick

This week, I went to a u-pick farm for the first time. I guess I have been to a u-pick farm before. I remember going strawberry picking once in Carnation, WA with my elementary school friend, Shannon, and her family when I was in the fourth or fifth grade. But since it has been so long since that experience, it feels like the first time. And like most things in my life, I got really enthusiastic about it and ended up going twice in one week - during the hottest week we've had in a long time. Apparently, super hot rays of sun won't stop me. 


When I got the bug to do this, I looked on-line for a good spot to go. I found a super helpful website called pickyourown.org that has information on all the local u-pick farms in the different counties in our area. I was originally going to go to a farm in Carnation, which seems to have a plethora of u-pick farms to choose from. But then, I found the Overlake Blueberry Farm in Bellevue, just 20 minutes from my house, resulting in berries even more local than the others. Not only is the farm practically in my own backyard, but it's organic too and they sell the blueberries for only...drum roll please...$1.50 a pound ($1.25 if you have 5lbs or more)!


On Tuesday, my good friend, Nicole, braved the sun and picked blueberries with me for two hours. We ended up with over 10 pounds of blueberries. Today, my sister, Rachel, and I picked blueberries for another two hours. Today, my bucket weighed in at 5.17 pounds - just a little more than what I collected on Tuesday. 


So, what am I planning to do with my 15 pounds of blueberries? I have already started freezing a ton, so that we'll have yummy summer fruit this winter. According to the handy book Jake got me for my birthday, The Busy Person's Guide to Preserving Food, the best way to preserve blueberries is to freeze the berries on a tray and then put them in a freezer bag. So far, I have frozen 21 cups of blueberries. The cool thing about frozen blueberries is that they can be used in recipes just as well, if not better, as fresh blueberries. 

I have also been making some fantastic dessert recipes that feature blueberries. Like I mentioned in last week's post, the recipe for Blueberry Boy Bait from SmittenKitchen.com is delicious. I also made this amazing Sunset recipe for Huckleberry Skillet Cobbler with blueberries. I highly recommend it. Just don't bake it when temperatures are going to be in the 100s or you'll feel like you're baking too. I learned that the hard way. 

Saturday, July 25, 2009

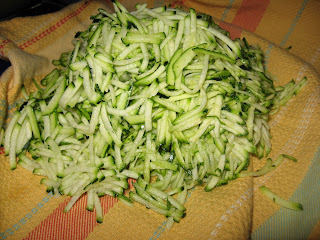
Zucchini: How I love thee! Let me count the ways.

Do you remember that part in Forrest Gump when the character, Bubba, lists off all the different ways to cook shrimp? Over three or four scenes, he rattles off, "There's shrimp gumbo, shrimp creole, coconut shrimp, shrimp stew, shrimp salad..." Well, that's what I was reminded of as I picked four new zucchinis from my garden today. So, in today's post, I present to you the various ways I have used the bounty of zucchini from my garden this season.

1. Simple sauteed zucchini with garlic and olive oil

2. Summer Squash Gratin (sans cheese) from 101 Cookbooks

3. Summer Squash soup with oregano salsa from the Vegetable Soups cookbook by Deborah Madison

4. Home-made pizza with basil pesto and zucchini medallions, inspired by this recipe from SmittenKitchen.com

Thanks to Radhi for the blog recommendation. I love it. The Blueberry Boy Bait recipe is amazing!

5. Fried Squash Blossoms (see July 10th post)


7. Health-nut zucchini bread from the Enchanted Broccoli Forest cookbook by Mollie Katzen

8. Zucchini Spaghetti, inspired by another recipe from SmittenKitchen.com

9. Zucchini Quiche, which is actually more like a casserole than a classic quiche. This is an old family recipe from my grandpa, who also grew a ton of zucchini.

10. Zucchini Chocolate Chip Cookies from Animal, Vegetable, Miracle.

These are the recipes I plan to make some time soon:
If anyone has any good zucchini recipes that they'd like to share, I'd be more than happy to have them. Cheers!

Friday, July 17, 2009

Oh, the joys of summer!

We ate the first three ripe tomatoes the other night with fresh basil from my garden and balsamic vinegar. They were still warm from the sun, I kid you not. It's amazing how home-grown tomatoes just seem to melt in your mouth. It was worth waiting for them to arrive through those cold and rainy winter and spring months.


Jake and I made a new delicious risotto recipe using zucchini and squash blossoms from the garden. I've heard that making risotto can be complicated, but it was actually quite easy. You've just got to keep stirring. I think the risotto was even better the next day.


Finally, I pulled this beautiful bunch of carrots up today. I have never grown carrots this large before. I learned that it is a good idea to plant carrots in a deep container so they have lots of room for their roots to grow. It pays off! I'm going to put them to use tonight in a new recipe from Heidi Swanson called Carrot, Dill, & White Bean Salad. I've got a pot of white beans simmering on the stove and a loaf of four grain-honey bread in the oven right now to go with it. It feels like an oven in my kitchen at the moment, but it'll be worth the sweat, I'm sure.

Sunday, July 12, 2009

City Chicken Chronicles: Part 1

A few weeks ago, something clicked in my gardening-obsessed brain and I started to get chicken-fever. I don't really know what started it all. It could have been the conversation I had in June with some parents at school that have chickens, which made me curious and secretly envious. It could have been all of the times I had to say, "Nope, I'm not going to get chickens" when asked by visitors to my garden. Or maybe it's just a natural progression - first a foodie, second a farmer's market consumer, then an avid kitchen gardener, and finally an urban chicken farmer? Whatever it was, I am officially inspired to have a couple of hens of my own and am now on the quest for as much information as I can gather. 

To see if this is even something I want to get involved in, I decided to go on the Seattle Tilth City Chicken Coop Tour. People around Seattle, who are raising chickens in the city, opened up their backyards and let us check out their set-ups in action. Tilth sent me a map of all the participating chicken-owners and then Jake and I toured around to different coops.  Of course, Jake will be my much-appreciated handy man in this endeavor, the one who will build my coop, so he accompanied me on the tour. He also brought his camera along so that we could take photos of all of our favorite coop features and details.

Here is what we learned so far:
1) Your coop and chicken run can be all one connected, attractive structure. By having these two areas connected, the birds can go into their coop to sleep and come out in the morning when they're ready, thereby making it a little more convenient for me. We will put hardware cloth, a form of heavy duty chicken wire, on the ground of the run and coop and up the side walls and roof to keep predators out.


2) Building a storage cabinet into the coop is a good idea. Where else am I going to put big bags of feed and bedding? Also, doors in different sections of the coop allow easy access to eggs and other areas for cleaning. The four little doors on the first picture can be opened up, allowing direct access to the little nesting cubbies where the chickens lay their eggs.


3) Chickens like tight, little spaces to lay eggs in. We were talking about the idea of using big country mail boxes for nesting cubbies so I could just open that mailbox door and collect my eggs. Then, Jake joked about engineering a mechanism with a flag on the outside of the mailbox that would let me know when I had eggs. I love it!


4) Chickens need a roosting bar to sleep on. Apparently, they poop a lot while on that bar, so if you put big baking trays or a drawer underneath that bar, you can just pull it out and clean it up really easily. According to the coop owners, they change the bedding anywhere from every 6-8 weeks to once a year. I imagine I'd be in the camp of 6-8 weeks, since I don't want it to stink out my neighbors. Plus, the bedding and manure will make great nitrogen-rich compost for my garden.


5) It's best to hang the food and water containers since chickens like to scratch and peck while they eat.


6) Lots of cute accents can be added to your coop like salvaged leaded stained glass windows or this adorable window box planter. Many coops that we saw feature recycled or salvaged materials.
  

The next step is to take the Coop Design and City Chickens 101 classes at Tilth for even more information. My plan is to get Lucy, Ethel, and Blanche...um, I mean, the chickens sometime next spring.  I am determined to do this with as much planning and preparation as possible, but it is all I can do to contain my excitement. 

Friday, July 10, 2009

Updates from my Kitchen Garden

My garden is in full bloom now. We're eating lots of different vegetables now - peas, beans, zucchini, kale, lettuce, and raspberries.


I've got lots of green heirloom tomatoes and cherry tomatoes growing right now. I noticed today that three big tomatoes on the largest heirloom plant in the garden are finally turning red. I can hardly wait to break into those.


Thanks to Radhi, I'm taking a class on Sunday at Seattle Tilth called Winter Gardening. I got a jump start on those plans yesterday when I started planting seeds for my fall and winter harvest. I planted red kale, Swiss chard, bok choy, carrots, onions, and peas. The picture above shows the new trellis I built for my peas. I have seen this type of trellis in other people's yards around town and have always wanted to build one for my garden. I'm not sure why I like them so much. Maybe because it is so simple and provides the peas with exactly what they need to climb. Stay tuned for pictures of their ascent.


I finally got up the nerve to harvest and cook squash blossoms. It's not that I was scared really, but intimidated for sure. I knew that they are typically filled with cheese and deep fried and that alone seemed like more hassle than it would be worth. In fact, when Radhi was here, we bought a couple from the farmer's market to try. We never did get around to figuring out what to do with them. So, two nights ago, when I was harvesting a zucchini for dinner, I saw all of the beautiful blossoms and was inspired to give it a try...for real, this time. I made a simple batter that consisted of 1 cup of spelt flour, 1 cup of water, 1/2 teaspoon of salt, and some dried oregano (which I grew, harvested, and dried a few days ago). After carefully rinsing the blossoms, I dredged them in some batter and fried them in some olive oil (not deep fried, just sauteed with a generous amount of olive oil in the pan). They turned out amazing. I didn't actually stuff them with anything, but it tasted like I did. As it turns out, it's not that hard to make them after all.


Finally, my class worm bin and the worms came home for the summer. It was good timing, actually, since it was about time to harvest the compost they have been creating since January. To begin the harvesting process, I put another bin, with holes in the bottom, right on top of the old worm bin bedding. Then, I put new bedding in the top bin and had the kids start putting new food up top to entice the worms upward.The top picture shows the top worm bin with new bedding. When most of the worms had made their journey to the new bin, I lifted the bin off of the bottom bin and took the bin full of compost out to my garden (see bottom worm bin picture). Before I started to use the new worm compost, I mixed a third of it back in with the new bedding. After all, I don't want to lose too many worms. Then, I shoveled out bits of compost, worms and all, and mixed it in with the soil around different plants in the yard. Now, I'll just keep feeding the worms (with used tea bags and fruit and vegetable scraps) until I can have my students contribute to my compost again in the fall. It doesn't get any better than that.

Saturday, July 4, 2009

Growing Green in Helena, MT

This weekend, Jake and I went out to Helena, MT to visit his sister, Amy, who just recently had a baby girl. Despite the fact that she's been incredibly busy with her beautiful little Allie, she has managed to get a ton of veggies out and into her garden, which I always look forward to exploring. She starts many of the seeds inside. In fact, it was in talking with her last fall that I started to get brave enough to think about starting seeds indoors.


When you first see the garden, you feel as though you're looking at an article in the Sunset magazine. Mike, Allie's daddy, created this amazing garden space with 8 huge raised beds, which are all enclosed by tall fencing to keep the deer out. When you walk in the gate, you are greeted by a beautiful orange-flower trailing honeysuckle and a variety of veggies and flowers growing in unique containers. My favorite is the rainbow chard grown in the sides of an old tool box.

What impresses me most is the scope of the operation (the amount of different vegetables she has growing in one space) and the size of the vegetables growing in the plots. Here are some of the things that have stood out to me the most:

1. She's growing corn. My dad would love it if I grew corn. I might try sometime, but if I understand it right, corn can be a little difficult to grow in our Seattle climate. Plus, you need to grow more than one stalk so they can cross pollinate. In other words, it would take quite a bit of my limited space. Despite my reservations, seeing the rows of leafy green stalks of corn growing in her garden kind of makes me want to grow a few in mine. It's like having a little piece of a farm in your own back yard.

2. She has a ton of each kind of plant. For example, she must have at least 15 tomato plants and too many pea vines to count. What is nice about quantity, and the reason I do square foot gardening to maximize my space, is that you will have enough food to harvest for meals. Imagine going to the supermarket to get enough of a vegetable for a meal - you could easily fill up a plastic produce bag for a dinner for four. A surplus of vegetables also provides food to preserve for the fall and winter. Jake and I enjoyed some of Amy's tomatoes from last summer, which we ate sun-dried with pasta this winter.

3. Onions - the onions she started from onion sets are huge - the size you see at the farmer's market. The ones she started from seed look a lot like mine, which make me feel pretty proud of myself. I still have a lot to learn.

Overall, the garden is amazing and when you walk into the space, it feels like you are in another world. I realize that I am really into the whole gardening thing, but I'm not exaggerating when I say that her garden is truly amazing and it makes me even more inspired to continue expanding my space.


Finally, today we took a trip to the Helena farmer's market. It wasn't too shabby, although there were more crafts than vegetables. Going to the farmer's market here during this time is like going to the Seattle farmer's market in the winter or early spring. Of all the craft booths there, I definitely found my favorite. I should say though, that I actually found it two days ago in a small shop in downtown Helena. The shop was called Frayed Sew, a super cute boutique devoted to handcrafted items. The owner and designer, Becky Schreiner, makes tons of cute bags, clutches, and other fun things with lots of beautiful, bright, and colorful fabrics. If I could have a shop of my own, I imagine it would look something like it - Amy Butler fabric galore.